Book Hoarder

>> 3.25.2014

See this wall? 


One day it's going to be covered floor to ceiling with white built-in bookshelves. We're saving up the money for some improvements in the house, including this one, but until then, I've taken it upon myself to collect books to fill those dream shelves. 


Finding interesting books is not as easy as you might think. And so I have kept a mental note to check every place I go for books with colorful or interesting spines, books with quirky titles, or maybe even books that we might actually have an interest in reading one day. 

Here are some places that I have found books:

Parent's/Grandparent's House - If your mom is like my mom, she has a TON of books that she has amassed over the years, and many of them she let me have. Especially those obscure 1980's parenting books and other dated books she will never read. 

Facebook - If you are looking to fill your bookcases, just ask your friends. Lots of times people are wanting to get rid of old books but would rather them go to a friend instead of donating. I inherited about 20 old reader digest hard bound books that way. 

Thrift Stores - Obviously this is a great way to get books, just beware that many thrift stores like to charge way too much. If you have to pay more than $1 for a book, I say it's not worth it, unless that book is really something special. 

Garage/Estate Sales - These kinds of sales are tough, because you never know what you're going to get until you walk up the driveway and start looking, but sometimes you hit the jackpot. 

Honestly, the only way I will ever read most of the books I'm collecting is if the zombie apocalypse comes and we are stuck in our house for ages with nothing to do, but even though most of the books won't be read, they will still help create an interesting space, and more importantly they will be given a second life. 

Read more...

Anthropologie Knock-off Table

>> 3.24.2014

Recently I submitted a project to Creating With The Stars Contest, and although I didn't get picked as one of the contestants, I am still going to do projects for all four rounds, just for the fun of it.

The first weeks is KNOCK-OFFS, which is one of my most favorite things to do. I saw this awesome cabinet at Anthropologie and thought it would be fun and a challenge to recreate.


I found this side table on Craigslist for $20 and talked them down to $15. 

She said it was solid wood, and it appeared to be, but you never really know what you'll find until you strip it down. Stripping is my least favorite part of the refinishing process, so I started on it as soon as I brought it home just to get it out of the way. 

I put a thick layer of citristrip on and after 30 minutes, the black paint came off really easily. 


However, with stripping paint, the easy part is getting the bulk off. The most painstaking and tedious process is when you've stripped it down but there are corners, crevices, and tough spots that don't come off so easily. Below you see most of the paint is off, but there's still lots of gunk and stain from the original finish. 


 So after I got all the excess Citristrip off and the piece was completely dry, I broke out the sander and sanded it down as much as I could.

Meanwhile I was also working on removing the wicker front of the door so that the wood rings would lay flat. It was simply stapled in, so I was able to pry it off with a screwdriver pretty easily. I then stripped down the door to the natural wood. 


After the door was stripped down, I cut a 1/4" thick piece of wood to fit the hole (where the wicker was) so that it was flush with the door. 

I took some dried wood from my mom's wood pile and had my brother-in-law saw 1/4" thick rings to place on the front. I was a little disappointed that there was a black dot in the center of each piece of wood, and also that the rings were smaller than the inspiration, but I didn't have any other dried wood branches. It was also free, and my alternative was to buy wood rings from Michaels, which I anticipate would have been about $15 (five bags of rings at $3 each.) I didn't want to double my costs, so I went ahead with with I had.  

  Anyone know if black spots indicate the beginnings of tree decay? 

I then stained everything except the wood rings with Minwax Golden Pecan and let it dry. 

I added the wood rings with wood glue and after the glue dried I stained the rings, using a polyurethane mixed with a tiny bit of Golden Pecan. I noticed that the rings soaked up the color when I did a test stain, so I decided to dilute it. 

I found this copper-ish drawer pull at Lowes for $2, and although it doesn't match the inspiration, it looks nice, and that's good enough for me. 

And here's the finished product. 


This project cost $21 ($15 for table, $4 for stain, $2 drawer pull) verses the Anthropologie table which is $398. 


Read more...

Fiddling Figs and Finding Foliage

>> 3.21.2014

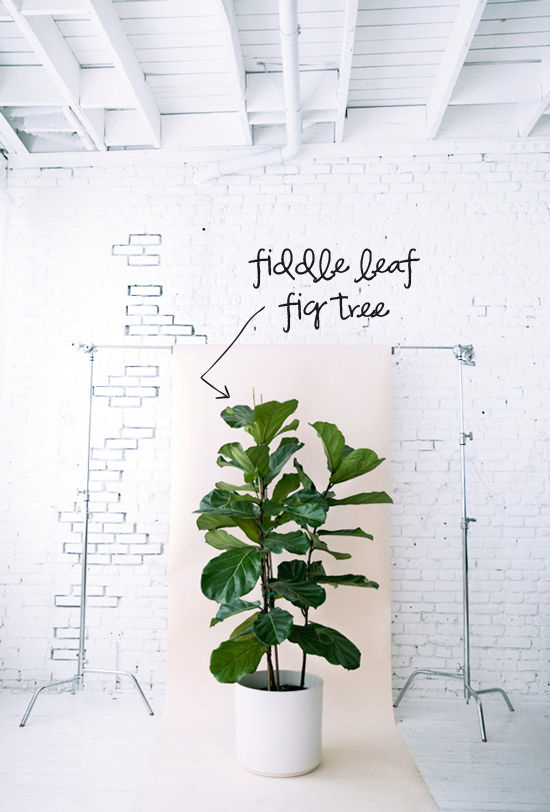
See this guy?

At Home in Love

He's a fiddle leaf fig. And he's kind of a big deal right now in the world of house plants.

This plant is really trendy in interior design because of it's large leafs, interesting angles and architecture. If any plant could be called modern, this would be it.

I think they're fantastic, and I would love to have one, but fiddle leaf figs are expensive, and I have yet to see one at a big box nursery in my area. Plus I have an awesome vintage bamboo plant stand that I wanted to put a house plant in, so a tall tree-like fig wouldn't work.

I got this plant stand at a thrift store for $7. It think it's groovy and interesting and I didn't want to do a thing to it!


So I have been in search of an interesting large leafed plant to put in my front room that has modern lines of the fiddle leaf fig, but that would fit on this stand and work with the lighting in the room.

The other day I found this Calathea at Lowes, and was instantly drawn to its interesting rectangular leaf. It was a large scale plant that would fit my plant stand, and it required low light, which is good since it wasn't going to sit in front of my window. And it was a great price at $11.


And it fits perfectly in the plant stand.


Here it is in its new home. I like how it adds some vibrancy to the room and adds some interest to an otherwise boring corner.


Now, if I can only keep it alive. 


Read more...

Embracing the Orchid

>> 3.18.2014

The Pantone color of the year for 2014 is Radiant Violet. 


I was kinda bummed about this year's color, only because I'm not a violet type of person, and because last year's color was emerald. And you really can't top emerald. But I challenged myself to incorporate the color somewhere in my home, and chose the guest bathroom as the place to do it.

I like making the spaces in my house pretty neutral so that when I want a change, all I really need to do is switch out a couple of accessories, pillow, hand towel, etc, and suddenly I have a different look. Our downstairs guest bathroom is a typical half bath, and we painted it a versatile gray color, which allows me to change it whenever my fickle heart desires.

There isn't much to this bathroom, and so it doesn't need a lot of accessories, so I added a violet hand towel and paired a violet candle holder with this lovely picture and flowers that were already in the room.


The hand towel was on clearance at Ross for $3.50 and the candle holder was $2.50 (50% off) at Hobby Lobby, so this was a cheap way to add a touch of a color that I never would have considered before.

What about you? Have you embraced radiant orchid yet?

Read more...

Table Trouble

>> 3.17.2014

I  bought a very heavy, solid wood, but a little scuffed up coffee table from someone for $5. My initial idea was to turn this into a lego table by painting it and glueing lego squares on it, but we put it upstairs as-is and saw how the kids used it all the time for multiple activities, and realized that it would have more function if we left it alone.


But I have this problem of not being able to leave things as-is, so the other day I brought it down to the garage and took all the finish off by stripping and then sanding it down. It honestly didn't look a lot different, but it was a lot less orange, which I liked.

 I really like the wood detail, and I decided to play off of the angles and add a stained pattern to it. Kind of a quilted aztec look.


I used some dark walnut stain that I already had, and did one light coat of stain, blotting off the excess. You can see how one light coat of stain really absorbed into the wood. Although I liked it, the way the wood soaked in the color should have been a warning signal for me to watch out for.

I really like the pattern and the way it compliments the wood grain. And it's subtle, which is good because the playroom already has enough pattern. 


So another problem I have, along with not being able to leave things alone, is that I am cheap and impatient. I was dying to see what the table would look liked finished, and I already had some danish wood oil in a light walnut finish that I thought would work, so I decided to just go for it, because it would be free, and I could do it right then.

But what I really should have done was sleep on it and then researched what stain would work best. Because as I was applying the wood oil, I realized it was turning out even redder than it was before I refinished it. It was not the look I was going for, and I was really surprised that the color ended up that way. I'm pretty sure this is cherry wood, so I am guessing that the wood's naturally red tone made it turn out this way. But instead of stopping halfway through, I finished it up, because I wanted to at least give the color a chance.


So this is what it looks like in the room. Although I like the subtle pattern on the table, I am having a hard time with the color, and I am concerned that it doesn't work in the space. I honestly wish it was just a little lighter and a lot less red. 

Here's a photoshopped version of how I WISH it had turned out.


I reeeallly don't want to start over on it. And I don't think I want to paint it. I don't think.

So for now, we'll keep it up in the playroom as-is, and I'll sleep on it. 


Read more...

When Furniture Speaks

>> 3.13.2014

We have this cedar chest that belonged to my grandparents, and when they died I inherited it and planned on refinishing it eventually. The inside still looks like the day it was purchased, tags and all, but the outside had been sloppily refinished and was losing its veneer. 

So fast forward many years and I still haven't refinished it and it's crammed into our closet and taking up storage space. I really wanted it out of the house, so I asked the rest of my family and no one else wanted it, so I pulled out the chest and took a picture of it and was headed to the computer to post it on Craigslist, when something stopped me. If my family, who should have some sentimental feelings towards it, didn't want it for FREE, then who was going to buy it from me? Selling it for $20 or donating it to Salvation Army made me cringe. 

And then I swear the cedar chest spoke to me and said I needed to refinish it, find a place for it in our little house, and keep it in the family..... so that's what I did. 

You don't argue with a seventy year old piece of furniture.
 

***I'm going through my Facebook archives where I had posted previous projects of mine. This one was posted in May of 2012. 

Read more...

Poster-size me

>> 3.10.2014

There are lot of walls to fill in our playroom, and I wanted to do at least one large scale piece of art for it. I love taking pictures of my kids, and in our old house we did a photo collage of my kids and their many facial expressions. Still one of my most favorite projects I've ever done.


I thought about trying the same thing again, but my kids are older and a couple of them would need some major bribing to do another shoot like that (hint: it's not Abby,) so this time I decided to do just three large photos of them doing what they love: pretending. I wanted to create a black and white editorial feel, but still keep is childlike. So I told the kids to go dress up and they came out as ms. fancy pants, a ninja, and a SpidermanJediHeroPokemonMaster, and we went out and did a super quick photo shoot. Photographing your own kids is a barrel of fun, let me tell you, so I was happy to get what I got. 

The next day I edited in black and white, cropped them 20x30, 300dpi, and ordered poster size prints from Sam's Club and picked them up a couple of hours later. The prints were only $9 each, which is a great price, although the pictures came out waaaay darker than I edited them, which makes me a little sad. And then I bought three black poster size frames for $12 each at Walmart and spray painted them Indigo by Valspar, to brighten them up a little.


In all the project cost $70, which is a lot more money than I would like to spend on art work, but that boils down to a little over $23 a piece, and considering the space it takes up, I think it's money well spent. 

And you come up the stairs, the pictures are right there smacking you in the face saying, HEY! This is our space! Come have fun with us!

There's still a lot left to do in the playroom, but we've got one wall filled up!

Read more...

About This Blog

  © Blogger template Simple n' Sweet by Ourblogtemplates.com 2009

Back to TOP