Twelve Days of DIY Christmas - Day 10 Under the Mistletoe

>> 12.12.2014

Kissing under the mistletoe is such a romantic, iconic part of the holidays, isn't it? Little do people know that they are smooching under a parasitic plant that sucks the nutrients out of its host. But the history of this custom is pretty cool, and any tradition that supports love and affection has my support!

Last year I picked my own real mistletoe, but this year, after seeing this cute little kissing ball at Target, I decided to make my own.


The target version used super thick wool felt, which you can't just buy at your local fabric store, especially in the right color, so I went with the next best option: fleece. I chose two colors close to each other, maybe even a little clashy, to add a touch of realism to it, because no plant is just one color.

Fleece however, is not a sturdy fabric, and I knew that if I were to use it as-is, my kissing ball would look more like a moppy-headed oscar the grouch. So I had to come up with a way to siffen the fabric. Luckily, there's a product out there that does just that called Stiffen Quick by Aleene's. Have you ever said stiffen over and over? It starts to sound really funny after a while. Anyway.........

The supplies you will need are

1/8 yard green fleece in two different colors.
White pompoms
Small styrofoam ball, I think mine was 2"???
Fabric scissors
Sewing pins
Stiffen Quick
Ribbon (about 30" long)
Hot glue gun


First, cut the fabric into small strips and round the corners. You will need almost all of the fabric for this project so go ahead and cut it all up.


Next, put the strips in a place where you can spray down the fabric, like a large bowl, or in my case, a trashed out cookie sheet. Take the spray and saturate the strips. You will want to be liberal with the spray. 


Next, take the strips and put them in the microwave. Yes. Microwave. Unless you want to wait hours for the strips to air dry. Place them straight on to the tray in the microwave. You won't be able to fit all of the strips in one round and will have to do four or more batches in the microwave. 


Microwave for two minutes. Then open the microwave and loosen up the strips from the tray, (they will stick a tiny bit) flip then over or just stir them around a bit, and then microwave for an additional minute. At this point they should be stiff. You can adjust the level of stiffness by the amount of spray, so if they aren't stiff enough, on the next batch saturate them a little more. 

p.s. This will the last time I will ever show you my microwave. Promise. 

Next, take your ribbon and tie it around the styrofoam ball. 

Then, take a felt piece, fold in half and place the middle section on to the ball. With a straight pen, secure the fabric onto the felt. Repeat, making sure not to leave gaps, and also try to avoid placing in straight lines. Change up the orientation or direction of the felt occasionally so that the felt doesn't lay in rows. 


Next, add the pompoms with hot glue, and you're done!


And here it is in it's place of honor. 


Read more...

Twelve Days of DIY Christmas - Day 9 Simple Glitter Garland

>> 12.10.2014

My Christmas mantle took forever to decorate this year. I threw some stuff up there and played around with it for a week or two and then took it down and started over again. I went to Home Depot Christmas tree stand and asked for tree remnants, which they give away for free, and I decorated the mantle with fresh evergreen, which was the foundation that I think I needed all along. Then I added a mix of clear, gold and red pieces of varying size and height. It finally looked good but it was missing something. So I ran to Hobby Lobby and got ribbon and glitter card stock to make a simple garland.


Here's what you'll need:

1" circle puncher
1-2 pieces of 12" square glitter cardstock 
Thin ribbon, embroidery thread or twine
Gluestick


(All I needed to buy was the cardstock and ribbon, which cost me a total of $2!!)

First, measure how long you want your garland to be by swaging it across your mantle. Cut the ribbon to size. 

Next, punch your card stock with the circle puncher. I used a whole sheet for mine, but if you want more circles, you can use up to two sheets. 


After your circles are made, put glue on the entire surface of one circle and put it under the ribbon. Then glue another circle and put it on top of the other circle, line it up straight and press down to make sure all sides are sticking together. And then repeat! I put a couple of inches between each circle on my garland, but it looks cute with more also! 


This garland was one of the easiest and cheapest projects I've done this season (the pompom sticks take the win) and yet it really finishes off the mantle. Never underestimate how little finishing touches like this can impact and complete a space. 


Read more...

Twelve Days of DIY Christmas - Day 8 Christmas Card Display

>> 12.08.2014

It's that time of year, when the US Postal Service rises from its half-buried grave to deliver those long awaited family pictures, Christmas cards and holiday greetings to our door.

It seems that there are social circles where Christmas card giving is still alive and well, but in others it has become a dying tradition. I think we lie somewhere in the middle, but I so wish that my mailbox was crammed full of holiday greetings. And so like a rain dance of sorts, I have created a cute way to display the amazing cards you are all going to send me.

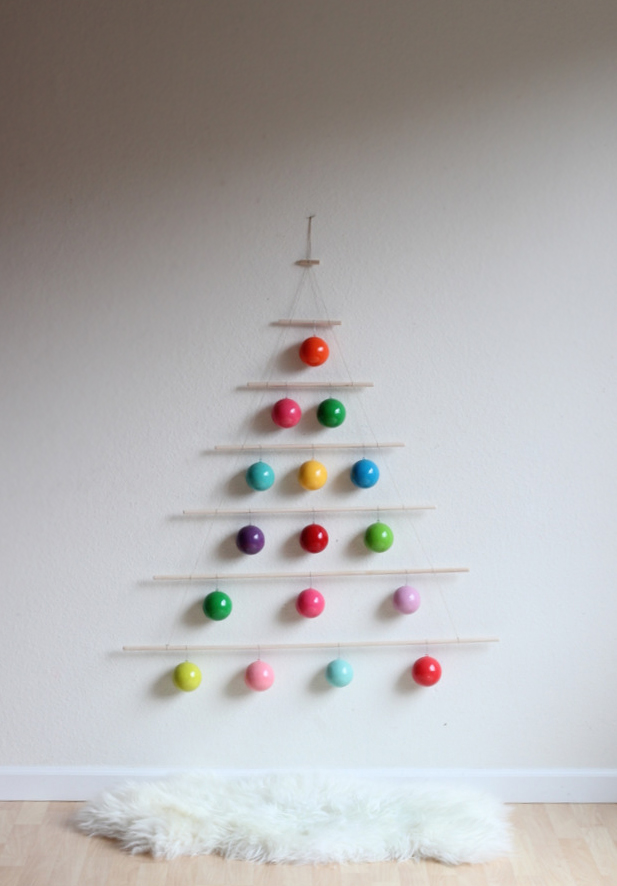
I wish that I had come up with the bones of my idea all on my own, but alas, I have to give credit to Jenny at Hank and Hunt who created this awesome modern Christmas tree.


I loved the simple lines of it, and thought it would look great as a Christmas Card display, but I wanted to add my own special touch to it.

The supplies I used for this were:

three 3/8 x 48" wooden dowels
twine
hacksaw
sandpaper
scissors
super glue
12 1/4" copper couplings (found in plumbing section of Home Depot)
1/2" copper elbow


First I measured and cut my dowels.
You will need these cuts: 6", 12", 18", 24", 30", 36"

The first dowel mark and cut 36" and 12"
2nd dowel, 30" and 18"
3rd dowel, 24", and 6"

(You will have about 18" leftover.)


Next, I sanded down the ends. I wanted to add the couplings to each end, but they are just slightly smaller than the dowel, so I sanded down each side of the dowel until the coupling could slide on tightly. Once sanded down, I added the couplings.

Next I laid out the dowels largest to smallest in the shape of a tree. I then measured out eight inches between each dowel and marked the floor (we were outside and didn't care about pencil marks on our porch) so to keep my measurements in check. If you want the tree to be smaller, try six inches between each rung.


Next, starting at the bottom dowel about four inches from the end, I took the twine and tied a double knot, and then moved up to the next dowel and tied an open knot. The open knot will allow you to make adjustments to the position of the dowels so everything is straight. Repeat this pattern all the way to the last dowel.

Then once you've reached the top, thread the twine into the copper elbow and give 6-8" between it and the last rung. It will act as the top of the tree. Then, going down the other side of the tree, repeat the ties, making sure your measurements are the same. This part is tricky, because you are doing open knots, and things tend to wiggle loose.

The most important measurements are between the bottom ties and the copper elbow at the top of the tree. If those are equal to each other, then you can measure the middle dowels easier. and your tree won't be all wonky. So when I did this, it was dusk, outside in the cold, and I was eyeing it most of the time. In hindsight, I should have waited and been a little more patient, but I was so excited to finish the project and I didn't want to wait. A classic flaw of a DIY-er.


Once you have all the dowels in place the way you want them, super glue the twine to the dowel. Once it is dry, turn it over, and there you have it. Keep the tied, super glued side to the back when hanging.


It looks pretty sparse right now so hopefully it will fill up quickly with holiday greetings!  The great thing about this is that next year I could use is as an advent calendar if I want. 

Where do you display your Christmas cards?

Read more...

Twelve Days of DIY Christmas - Day 7 Glitter Ornaments

>> 12.05.2014

I am a traditionalist when it comes to Christmas, and I love decorating with red and green. But this year I wanted to branch out (ha! branch! get it?) and incorporate teal, copper, and gold on my Christmas tree.  Of course I could have gone out and bought ornaments, but that's no fun. Instead I decided to try to make my own.

Have you seen the ornaments floating around on Pinterest that use floor wax? Well if not, prepare for it to BLOW. YOUR. MIND. Well not really, I've just always wanted to write that. But it is a pretty cool technique.

So because its late and I have laundry to do, I'm going to take the easy way out and send you HERE to find out how it's done.

It's insanely easy, and I am slightly addicted to making them. They are so much more sparkly than store bought, and the colors you can create are limitless. Oh and I hear they hold up pretty well in storage in the summer heat, which is important to us Texans.

 Here they are on my tree.


Read more...

Twelve Days of DIY Christmas - Day 6 - Christmas Tray

>> 12.02.2014

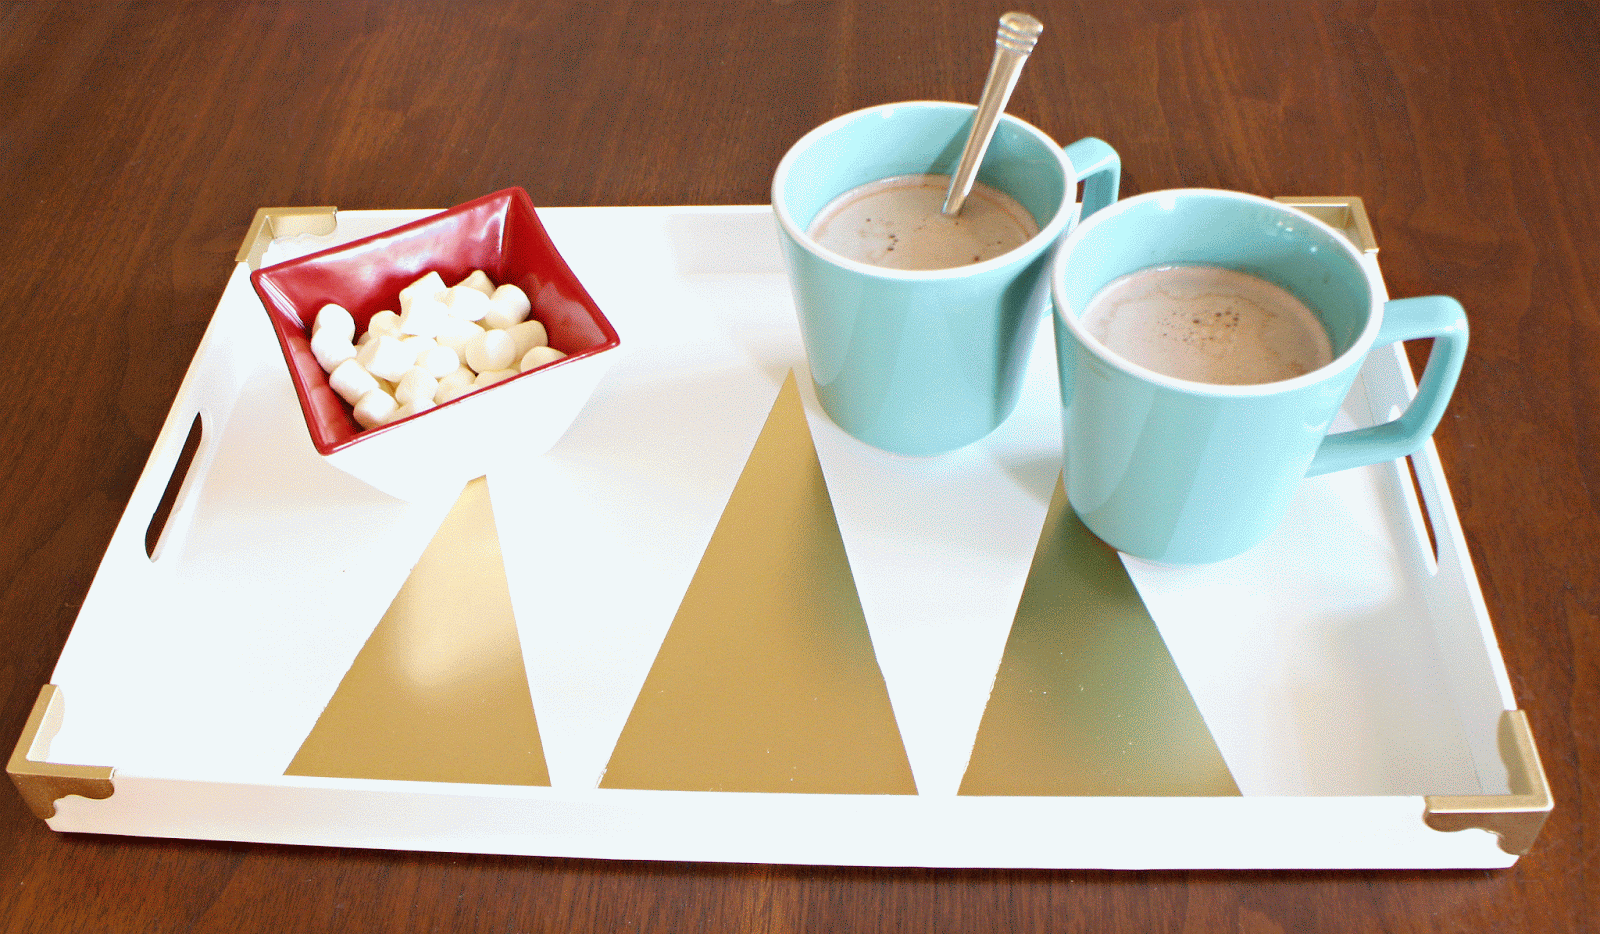
I bought this tray at a thrift store for a couple of dollars a while back and decided to fix it up and turn into a Christmas Tray.


The tray needed a lot of work. So first thing I did was sand down the ridges of the print on the tray.   It was sort of engraved in there so I hoped it wouldn't show through. When I was sanding the sides, the corner pieces popped off which was awesome because I didn't know they were separate. So that made the project even better! I primed the tray and gave it two coats of white spray paint, and then I sprayed the corner pieces with Rustoleum Gold Metallic spray paint.


Then using Martha Stewart adhesive stencil film, I drew out the image I had decided on. It really took me forever to figure out what I wanted to do, but I settled with something that looked christmasy but could work the rest of the year too. I cut it out using an x-acto knife and ruler to get a straight line.


Before spray painting, I taped up the rest of the tray. I sprayed two coats of gold spray paint and after it dried I carefully removed the film.


I love the way it turned out! Definitely better than the original! My daughter, who thinks hot chocolate is one of the five food groups, is ecstatic to have a fancy tray for serving hot chocolate!


And just a reminder of what it looked like before!


Read more...

About This Blog

  © Blogger template Simple n' Sweet by Ourblogtemplates.com 2009

Back to TOP