Wicker Chest Makeover

>> 5.30.2014

I found this wicker chest for $7.50 on one of my recent trips to the thrift store, and I was super excited because I have been looking for something to hold my kids' dress-up clothes. It was in relatively good shape, but definitely needed a facelift, so I decided to paint it.


My first thought was to spray paint wide navy stripes, so I got out the painters tape and plastic and created a pattern. I immediately suspected failure however, because the tape was not sticking at all. But I decided to follow through just to see what would happen.


After I finished taping off, I put on a glove and held down the tape in the areas I was spray painting to try to eliminate over spray. It worked ok, but didn't eliminate the problem completely.


The bigger issue was that the paint was glossy and the color was more royal blue than I wanted. It just looked horrible and not very wicker-like. So then I sprayed the whole top blue. Even worse. And so I cut my losses (a single can of spray paint) and bought a tester size of Midnight Dream by Behr in a flat sheen and painted over it. Much better. Once the blue was dry, I used some leftover pink and painted smaller stripes to give it a little pop and tie into the colors of the playroom.


I think I'm glad I sprayed first, because it did a great job of covering all the grooves and crevices, which would have been a pain with a paint brush. So in the end, I don't think I regret it, but just like many DIY projects, I have learned a lot. Total cost for this project was $14!


Any of you have big DIY plans for the weekend? I'd love to hear!


Read more...

While we're on the subject of walls....

>> 5.27.2014

A few months ago I decided to do some drastic painting in the playroom and upstairs hallways. You can read about that HERE. And sadly, it's taken three months to return back to the hallway and finish it up.

I wanted to do a small gallery wall with the kids' art, as well as few family pics and happy quotes, and I have been inspired lately by collages with a mixture of frame colors like this:


I love that there is a cohesiveness, but they aren't matchy-matchy. I am also drawn lately to thin frames with white mats, so that was definitely part of the criteria when hunting for frames.

I decided to go with thin white, black, oak and gold frames. I found most of them at Salvation Army for $1 to $2 a piece, and most of them came with mats, albeit ugly ones. But that was easily fixed with a few light coats of white spray paint.

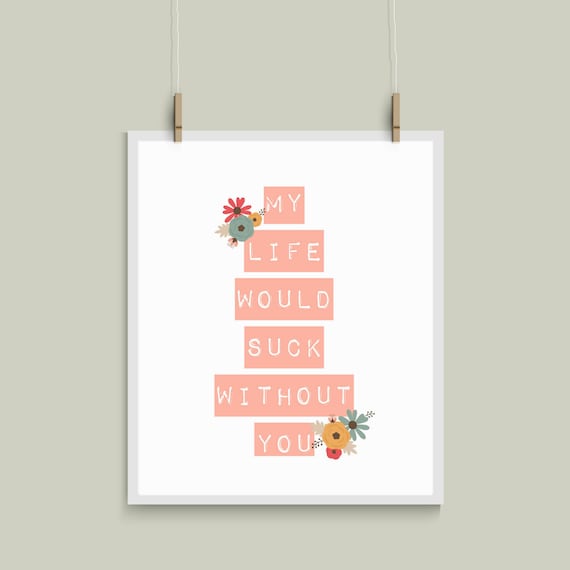
I framed some of the kids' art, and grabbed a few family pictures and quotes I already had, and then went online in search of some other fun quotes to complete the wall. For the hallway, I wanted typography that was colorful and not extremely wordy or busy, and also something I could download and print. Etsy is the place to go for prints for your walls, but weeding through the thousands of choices is a chore. Lucky for me, my friend Jande had just recently opened up a Etsy shop called InspireYourArt and it is FULL of just the things I was looking for.

I love the colors on this one:

InspireYourArt

And the simplicity of this:
InspireYourArt

And I mean, who doesn't love the irony of a dainty feminine poster with angry girl anthem lyrics?

InspireYourArt
So I purchased, downloaded, printed and popped these into their frames in no time at all. What takes the longest is arranging them on the wall. With a collage of frames in varying sizes like this, sometimes you have try try out a bunch of different combinations in order to get the right look.


What used to be my least favorite part of the house is now one of my favorites. Seriously, this is a 1000% improvement from the boring, beige and dark armpit that it was four months ago. It's happy, colorful and full of personality, and I hope that as my kids pass by it every day they will absorb some of that happiness.

And to bring you a little happiness as well, Jande is offering 50% off to all my Mid Mod readers! Her downloads are only $5, so half off is a STEAL! Go visit her STORE and enter MM50OFF at check out to receive your discount!


Read more...

Featured

>> 5.19.2014

I was featured in a new link-up party called Off the Hook Monday last week sponsored by Daisy Cottage Designs and Little Monkeys Crochet.  Hop over there and see this week's entries. People link up anything from recipes to crochet to home makeover projects like mine, and it's a wonderful place to find creative inspiration.


Daisy Cottage Designs

Also, if you haven't liked my Mid Mod Facebook page, please do! 

Read more...

Abby's Room Mini Makeover Part III - Picture Wall

The last part of Abby's room to tackle is the wall with her bed on it, which is a completely blank wall with lots of possibility. This wall poses a few problems, however. To save space, I did not center her bed on the wall, and instead moved it closer to the window so that she has more play space. So that creates a problem for anything going on that wall, because if you center it with the wall, it won't be centered with the bed. Make sense? So to remedy that, I initially wanted to do a gallery wall that would take up a great portion of the wall, like this. Please pardon my rudimentary graphics.


But I also had two pictures shelves from Ikea that weren't being used, so I thought I would work those into the plan and instead do shelves with pictures. That of course poses an issue because if I centered the shelves, they would be off center with the bed, like the figure below.


And if I centered them above the bed, there would be a lot of empty space, especially when the door is closed. And it's a little boring.


So instead I opted for a hybrid of the two and staggered the shelves and added two larger frames on each side, like so. 


I think this was a great option, because your eye isn't looking for the center point of the display like in the second and third example above. And it's a little more interesting than just a collage of pictures, like in the first example. But the best thing I like about the last option, is that we can easily change out the art and rotate the frames around by simply taking them off the shelves. Perfect for a budding artist with a revolving repertoire.


So aside from getting a new fan (the existing new world ornate fan doesn't quite work in here) I think I am finally finished with Abby's room.

Here's the breakdown in costs for this mini-makeover. Since most of the things I already had, the costs were pretty minimal. And of course, these are rounded-up figures, not exact.

Desk paint: $15
Stool: $10
Fabric and paint for stool: $10
Lamp: $5
Paint for Bookcase: $12
Paper for bookcase: $2
New Bedspread: $15 (Thanks, Target Cartwheel!)
White sheets: $15
Frames: $12 (mostly from Ikea)
Flower arrangement: $4

Total spent: $100

And to refresh your memory, here's the rest of her room:


Read more...

Mini Makeover Part II - Reinventing a Bookcase

>> 5.09.2014

Opposite the wall with desk is Abby's dresser. It used to stand alone, but I decided to bring in this old black bookcase and a frame to see how they fit in the room. Obviously they looked very out of place, but the scale was right, so I set out to refinish them.


I sanded, primed and painted the bookcase, and then I went to Michaels and got this scrapbook paper for .20 cents each.


I could have done chevron, or another trendy pattern, but I really like the thought of keeping a girly timeless look and adding modern elements with accessories, and it fits well with the colors and decor of her room.

First I measured each piece and then used spray adhesive to adhere it to the backs of the bookcase. The measuring takes a little bit of time, but glueing them on takes no time at all and you don't have to wait for it to dry. It took nine sheets of paper, so a total of $2.20 to add some fun to an otherwise boring piece.

Then I took it up to her room and gathered anything in the house that might work (including all her nick-knacks)  and styled the bookcase.


And here it is in the room.


This part of the makeover was actually several mini projects in one. Along with the bookcase and large frame above it, I also painted the lamp base, and the dance sign. You might also notice the little shelves on the adjacent wall. That is a little shelf that I like to call a Granny Nook, so Abby can put more of her collectables and nick-nacks. I got it for free from a family member, (thanks, Damaris) and I painted it white as well.  

Next up in the bed wall, and I'm dreading it because it involves lot and lots of frames. If you don't hear from me in a while, you know what I'm doing. 

Read more...

Desk Reveal - Abby's Mini-Makeover Part I

>> 5.05.2014

My eight-year-old daughter is a junk collector. I've heard, "Can I keep that?" more times than I can count. She loves art, so there's always piles of paper, cut up boxes she pulled from my trash can, beads, random things glued to card stock, you name it, strategically placed all over her room. She's also very good at finding a use for anything that I would consider junk, and so the contents in and on top of her dresser, desk and night stand are always changing.

I was a lot like her as a child, and I really think that's all a part of being a creative little girl, so I don't mind so much that she does it, we just try to keep it under control. Once a month or so when she is in school, I will grab a trash bag and practically fill it full of art project remnants and junk, and then make her room pretty, and she usually is so happy that her room looks polished and put together that she doesn't even miss the now trashed junk.

A while back I went upstairs and snapped a picture of her desk as-is. I didn't add or take anything away, and this is how it usually looks on any given day.

It's not too bad, but definitely not a decorator's dream.

She has been asking me to paint her desk for a while now, and she wanted pink. This desk used to be in the living area of our old house, so it definitely needed a change in color. Here are a couple of the inspiration desks that we liked.
Original source not found.
Stiltskin Studios

I thought while I was changing the color, that we would work on de-junking and making her room a little more grown-up, so the desk project will be part one of a mini-makeover.

For those of you that follow my Facebook Page, you saw that last week I showed the refinishing process of her desk in real-time posts. You can see the process HERE. 

And after allowing it to cure for four days (because it's going to get a lot of use) here it is back in her room.


The wall art is from Target (circa 2012-13), as well as the lamp that somehow I got on clearance for $5!


The stool was a find from a thrift store that I refinished. You can read about that HERE.

I am sure that in a few days this desk will be full of Abby's personal treasures again, but that's okay. I'll always have pictures to remember it by.  

Read more...

Stool Makeover

>> 5.02.2014

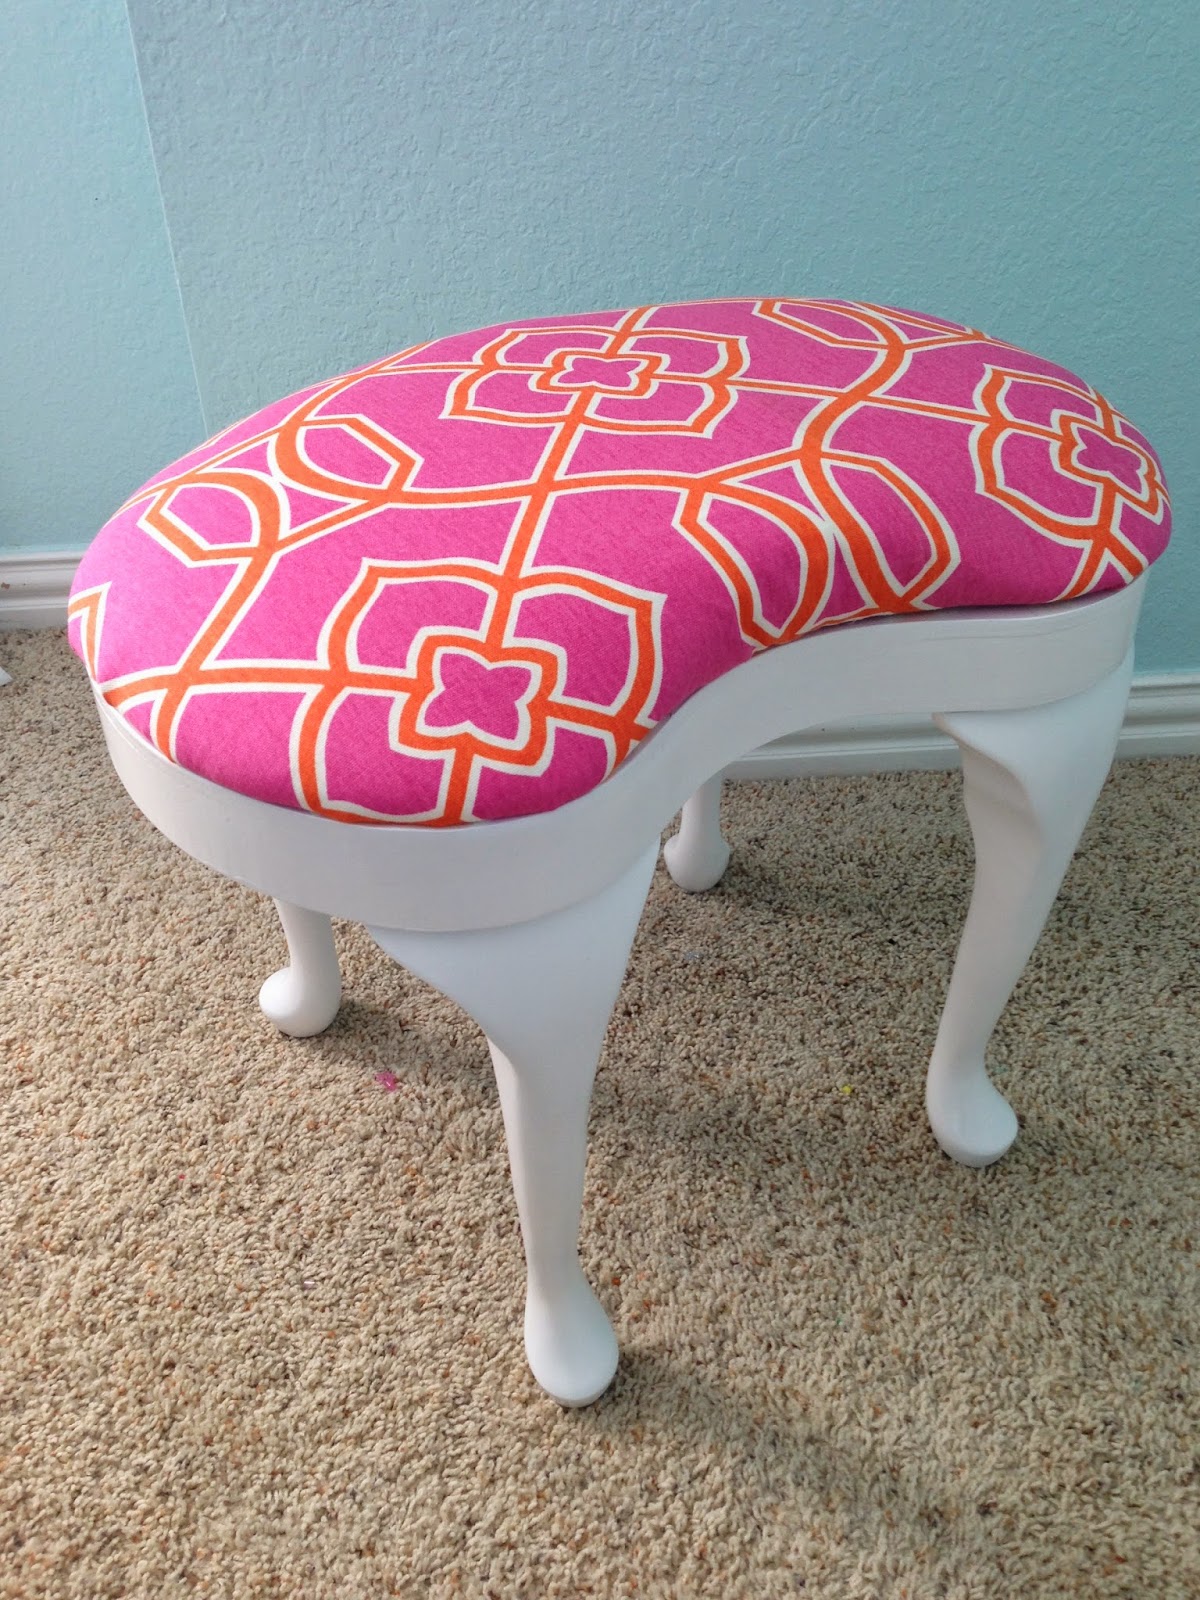
I'm doing a mini-makeover on my daughter's room, including refinishing a desk. I was looking for a stool to use in place of a chair in her room, and so I was super excited when I happened upon this guy at a thrift store for $10.

My sisters quickly named it the 'Butt Chair," and yeah, I guess it does kind of look like a fancy butt.


I removed the two layers of fabric and staples and primed the whole piece with spray primer. I didn't really like how the fabric covered the wood part, and although it wasn't meant to be exposed, I decided to keep the base visible. 

That meant I needed to fill in a few cracks to make it look a little more seamless. 


After it dried I sanded it down and did a few coats of white satin finish spray paint.

I then moved on to the bench. I had to create a new base to put the cushion on, so I took a 1/4 piece of plywood, traced the seat pattern, and then it cut with a jigsaw. I got some awesome fabric at Hobby Lobby for $6 a yard and used the existing cushion and stapled it on to the plywood.


I then cut the excess fabric off and hammered in the staples.


I then screwed the seat to the base and voila! No more butt stool!


Or maybe you still think it looks like a butt?

For kicks, here's the before and after:


I'm considering "dipping" the legs with pink or maybe even gold, but for now I'll leave it as-is.

Stay tuned for the desk reveal as well as the finished mini-makeover!

Read more...

About This Blog

  © Blogger template Simple n' Sweet by Ourblogtemplates.com 2009

Back to TOP